 Save
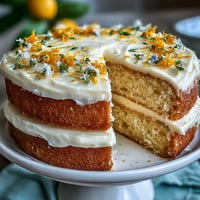
Save My cousin texted me three weeks before her graduation asking if I could make her cake, and I'll admit I panicked a little. She wanted something bold, something that showed off her school colors in a way that felt modern and celebratory, and that's when the ombre cake clicked into place. I spent an afternoon testing color ratios and baking techniques, and by the time I nailed it, my kitchen smelled like vanilla and possibility. There's something magical about a cake that gets progressively lighter or darker with each layer—it's not just dessert, it's a visual story.
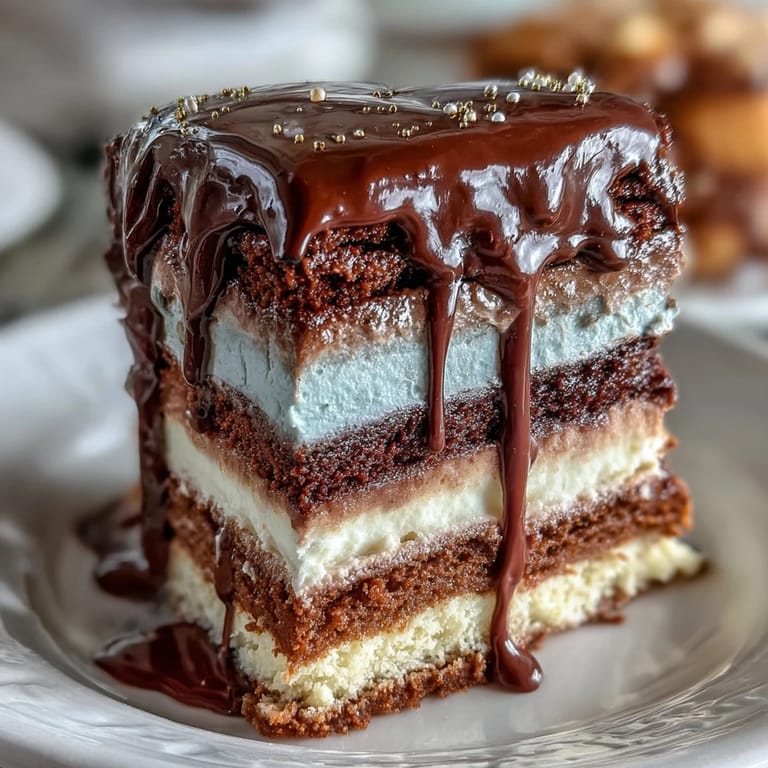
I'll never forget frosting this cake at 11 PM the night before the party, my hands cramping as I blended the colors from dark to light around the sides. My mom kept sneaking tastes of the buttercream from the bowl while offering unsolicited advice, and somehow that chaotic hour together made the cake mean more than it would have otherwise. When my cousin cut into it the next day and gasped at those perfect gradient layers, I realized the stress was worth every second.
Ingredients
- All-purpose flour (3 1/4 cups): Use a reliable brand and spoon it into your measuring cup rather than scooping directly—this prevents packing and ensures consistency across all four batters.
- Baking powder (2 1/2 tsp): Check the expiration date; old leavening agents won't give you that tender crumb you're after.
- Unsalted butter (1 cup for cake, 1 1/2 cups for buttercream): Room temperature is non-negotiable here—it incorporates air and creates that light, fluffy texture that makes people ask for seconds.
- Granulated sugar (2 cups for cake, 1 1/2 cups for buttercream): The sugar dissolves into the butter, creating the structure that holds those delicate layers.
- Room temperature eggs and milk: Cold ingredients slow down the creaming process and can break the emulsion, leaving you with a dense, greasy cake instead of a tender one.
- Vanilla extract (1 tbsp for cake, 2 tsp for buttercream): Use real vanilla; it gives the cake depth and warmth that imitation can't quite match.
- Gel food coloring: This is the secret—gel is concentrated, so it colors beautifully without thinning your batter the way liquid coloring does, which would throw off your measurements.
- Egg whites for buttercream (6 large): They need to be scrupulously clean and free of any yolk; even a trace of fat will prevent them from reaching those glossy stiff peaks.
Tired of Takeout? 🥡
Get 10 meals you can make faster than delivery arrives. Seriously.
One email. No spam. Unsubscribe anytime.
Instructions
- Set yourself up for success:
- Preheat your oven to 350°F and grease those four 8-inch pans generously, lining them with parchment paper for easy release. Having everything ready means you won't scramble later or forget a crucial step.
- Build your dry foundation:
- Whisk together flour, baking powder, and salt in a medium bowl—this aerates the flour and distributes the leavening evenly. It's a small step that makes a real difference in the final crumb.
- Cream butter and sugar until it's billowing:
- Beat them together for a solid 3-5 minutes until the mixture is pale, fluffy, and noticeably lighter in color. You're whipping in air pockets that will become tender tunnels in your cake.
- Add eggs like you're coaxing them in:
- Drop them in one at a time, waiting until each is fully incorporated before adding the next—this keeps the batter smooth and emulsified. If it looks broken or curdled, don't panic; a splash of flour mixture will bring it back together.
- Alternate wet and dry without overworking:
- Begin and end with the flour mixture, mixing just until you don't see streaks of white flour anymore. Overmixing develops gluten, turning your delicate cake tough and dense.
- Divide and color your batter strategically:
- Split the batter into four equal bowls and tint each one with increasing amounts of gel coloring, starting with the lightest shade and building to the darkest. A toothpick or skewer is perfect for testing color concentration before committing.
- Pour and smooth with a gentle hand:
- Divide each colored batter into its prepared pan, smoothing the tops level so all four layers bake evenly. Tap each pan gently on the counter to release any trapped air bubbles.
- Bake until just set:
- Watch for 22-25 minutes until a toothpick inserted in the center comes out clean with just a few moist crumbs clinging to it. Err on the side of slightly underbaked rather than dry—the carryover heat will finish them perfectly.
- Cool with patience:
- Let the cakes rest in their pans for 10 minutes, then turn them out onto wire racks to cool completely. Frosting a warm cake will melt the buttercream and create a messy situation.
- Create silky Swiss meringue buttercream:
- Whisk egg whites and sugar over simmering water until the mixture reaches 160°F and feels smooth when you rub it between your fingers. This eliminates food safety concerns and creates a more stable emulsion than raw eggs.
- Whip until cool and cloudlike:
- Transfer to your mixer and beat on high speed for about 10 minutes—the mixture will transform from hot and loose to cool, stiff, and glossy. This is where the magic happens; don't skip this step.
- Add butter gradually, watching the transformation:
- Add softened butter a few cubes at a time, allowing each addition to incorporate fully before adding more. If the buttercream breaks into a curdled mess (which happens sometimes), keep beating—it will come back together.
- Tint if desired for your gradient effect:
- Divide the buttercream into portions and tint each one to complement your cake layers. You can blend colors while piping for a subtle ombre, or keep them separate for bold contrast.
- Assemble from dark to light:
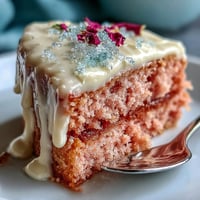
- Place your darkest cake layer on a cake stand and spread it with buttercream, repeating with each successive layer to create an ombre effect that's visible from the side. The gradual color shift is what makes this cake visually stunning.
- Apply a thin crumb coat first:
- Spread a thin, even layer of buttercream over the entire cake and chill for 20 minutes—this seals in crumbs so your final frosting stays pristine. It's an extra step that separates a sloppy cake from a polished one.
- Finish with your final frosting:
- Apply a generous final layer, smoothing with an offset spatula or blending colors as you go for an ombre effect. The presentation is part of the celebration, so take your time and enjoy this part.
- Decorate and chill:
- Add edible pearls, a graduation topper, or piped details as soon as the frosting is set enough to hold them. Chill until everything is firm, then bring to room temperature for serving so the cake is tender and the flavors shine.
 Save
Save The best part came after the graduation party when my cousin's friends asked for my contact info to make their own celebration cakes. I realized that a beautiful cake doesn't just mark a milestone—it becomes the thing people remember and want to recreate for their own important moments. That's when I understood this recipe was worth the extra effort.
Why Gel Food Coloring Is Worth the Hunt
I spent years using liquid food coloring because it was what I had on hand, and I never understood why my ombre layers looked muddy and weak until I finally tried gel. The difference is almost shocking—gel gives you rich, vibrant color without diluting your batter, which means your cake stays light and fluffy instead of becoming dense and oily. Once you go gel, you'll wonder how you ever lived without it.
The Swiss Meringue Advantage Over American Buttercream
Swiss meringue buttercream is silkier, less cloying, and far more elegant than the powdered sugar versions I grew up with, though it does require a little extra technique. The warmth from the egg whites creates an emulsion that feels almost mousse-like, and it holds its shape beautifully in warm weather when American buttercream would start to weep. It's also less sweet, which means people can eat an actual slice without feeling like they've had dessert overload.
Making This Cake Your Own
The gorgeous thing about ombre cakes is how flexible they are—you can customize the colors to match literally any celebration or theme. School colors, sunset gradients, even a chocolate ombre if you swap some flour for cocoa powder makes this cake work for birthdays, weddings, retirements, or any milestone that deserves a moment. Your cake can tell your unique story.
- If you're nervous about hand-mixing colors, try tinting the buttercream in a muffin tin using small bowls and a toothpick for precise color control.
- Leftover buttercream freezes beautifully for up to three months, so you can make a double batch and have it ready for your next celebration.
- The cake itself also freezes well wrapped tightly—bake it a day or two ahead, freeze it unwrapped, then frost and decorate on party day.
 Save
Save Making this cake is less about following instructions and more about taking time to celebrate someone you care about—the careful color gradations, the patience with the buttercream, the late-night decorating sessions all become part of the gift. Your hands, your effort, and your care are baked into every layer.
Common recipe questions
- → How do I achieve the ombre effect on the layers?
Divide the batter evenly and tint each portion with progressively stronger gel food coloring to create a smooth color gradient across the cake layers.
- → What is the best way to make Swiss meringue buttercream?
Whisk egg whites and sugar over simmering water until sugar dissolves, then whip to stiff peaks before gradually blending in softened butter and vanilla.
- → Can I prepare parts of this cake in advance?
Yes, bake the layers and prepare the buttercream a day ahead. Store layers wrapped and buttercream refrigerated, bringing both to room temperature before assembly.
- → What tools are essential for decorating this cake?
Use piping bags with decorative tips, an offset spatula for smooth frosting, and optional edible pearls or themed toppers for finishing touches.
- → How can I intensify the ombre colors?
Gel food coloring provides more vibrant hues than liquid colorings, allowing for deeper and more distinct gradient layers.