 Save
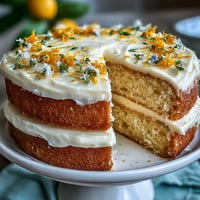
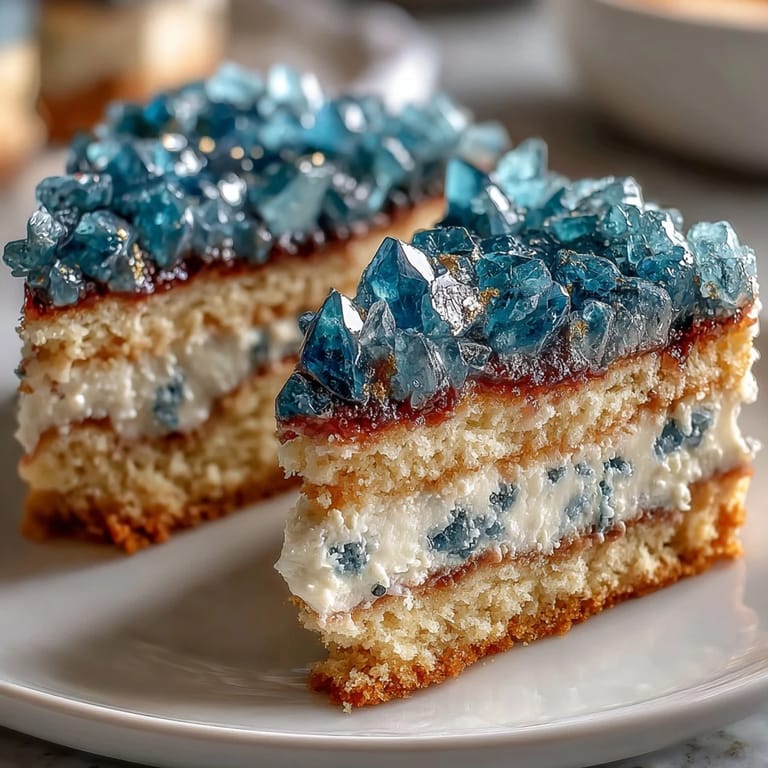
Save The first time I tackled a graduation cake dressed in teal and gold, the kitchen felt like a scene straight from a design workshop rather than a bakery. It wasn’t just about mixing vanilla batter, but about a creative explosion: edible geode crystals and shimmering gold edges. Somewhere between measuring flour and swirling teal buttercream, I realized how much joy is tucked inside the artistry of cake decorating. Even the scent of vanilla managed to seep into every corner, promising celebration and anticipation. Turning ordinary ingredients into a slice of gemstone magic was unexpectedly thrilling.
When my cousin graduated, our kitchen became a flutter of activity, with shimmering gold leaf and teal crystals scattered across parchment. The pressure to impress was real, but we laughed every time a streak of teal ended up on someone's cheek. The cake became a centerpiece not just for its look but because it captured the excitement, nerves, and pride of that day. Cutting into that geode slice, everyone paused to admire the sparkle before devouring their piece. That moment, surrounded by family, was pure joy.
Ingredients
- All-purpose flour: Gives the vanilla cake a sturdy base for stacking and carving; sift for a lighter crumb.
- Baking powder: Ensures lofty layers; check freshness so your cake rises perfectly.
- Salt: Balances sweetness; I always sneak in a little more if the butter is bland.
- Unsalted butter: Room temperature is key for creamy batter and smooth buttercream—leave it out an hour before baking.
- Granulated sugar: Sweetens and tenderizes the crumb; blend thoroughly to dissolve for a velvety cake.
- Eggs: Add richness and stability; let them come to room temp for easy mixing and maximum volume.
- Vanilla extract: The backbone of flavor; use pure extract for that warm aroma.
- Whole milk: Makes the batter silky; adding it in parts prevents curdling.
- Powdered sugar: Sifted for a cloud-like buttercream that spreads effortlessly.
- Heavy cream: Turns buttercream into a spreadable dream; add slowly for just-right texture.
- Teal gel food coloring: Packs vivid color with only a drop; gel types won't water down your buttercream.
- Rock sugar crystals: Form the geode; crush gently for smaller pieces and deep sparkle.
- Edible gold leaf: Brings luxury; use tweezers for delicate placement on the geode.
- Simple syrup: Optional, but sipping cake layers prolongs freshness—brush lightly and don't oversaturate.
Tired of Takeout? 🥡
Get 10 meals you can make faster than delivery arrives. Seriously.
One email. No spam. Unsubscribe anytime.
Instructions
- Mix the Vanilla Cake Batter:
- Combine flour, baking powder, and salt, whisking until airy. Cream butter and sugar until pale and fluffy, then add eggs and vanilla—alternating dry mix and milk creates a smooth, balanced batter.
- Bake and Cool the Layers:
- Divide the batter among greased pans, bake until golden and a toothpick comes out clean. Let layers rest in their pans for 10 minutes before tipping onto racks for thorough cooling.
- Make the Teal Buttercream:
- Whip butter until creamy, then slowly mix in powdered sugar and vanilla, adjusting consistency with cream. Color most of the buttercream teal—reserve a portion uncolored for crumb coating.
- Dye and Dry Sugar Crystals:
- Place clear rock crystals in a bowl, add a few drops of teal gel color, and mix gently until the shade is consistent. Lay crystals flat on parchment to dry if they get sticky.
- Assemble and Stack the Cake:
- Level cooled layers with a serrated knife, optionally brushing with simple syrup. Stack with buttercream between layers, crumb-coat with reserved buttercream, and chill for firming.
- Frost and Smooth the Cake:
- Spread teal buttercream all around, smoothing the sides and top with an offset spatula for a flawless finish. Chill before carving to prevent smudges.
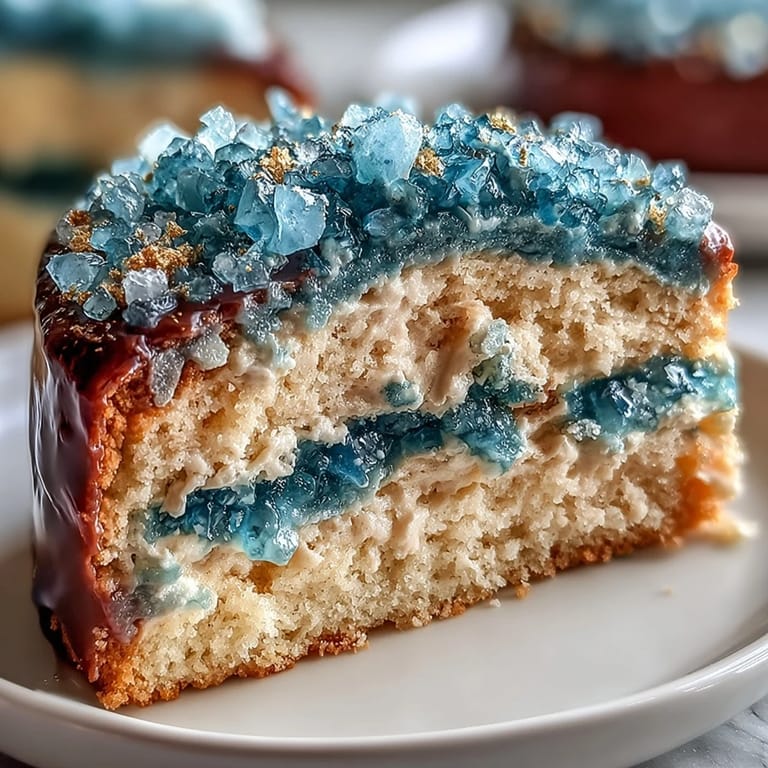
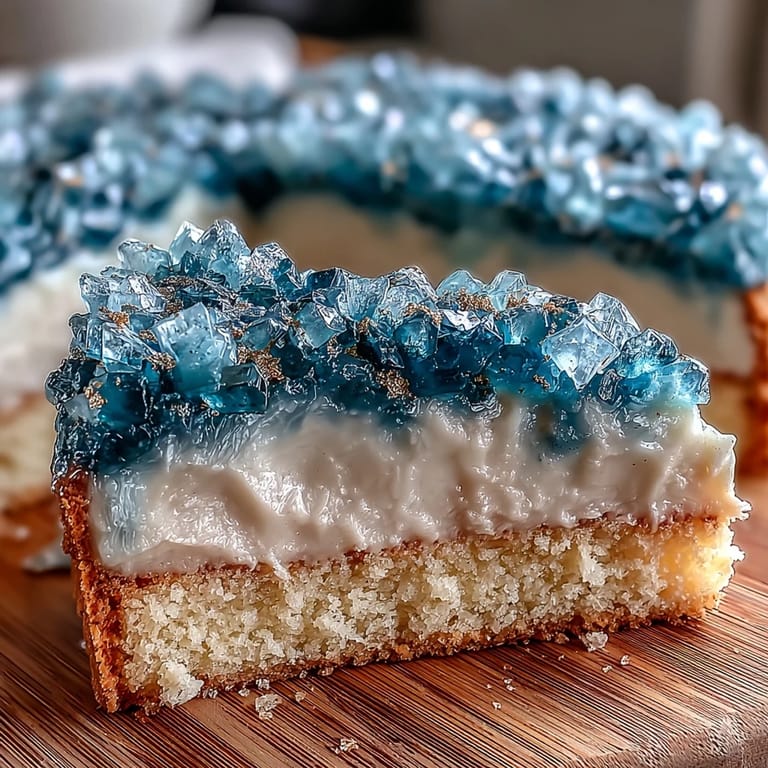
- Create the Geode Slice:
- Carve a wedge into the cake, revealing the center. Coat the cut area with buttercream, then press teal sugar crystals in—layer lighter ones centrally and deeper hues toward the edge.
- Paint Gold Edges and Final Decor:
- With a food-safe brush, highlight the geode edges using gold leaf or luster dust mixed with alcohol. Finish with extra gold touches and, if you like, a graduation topper.
 Save
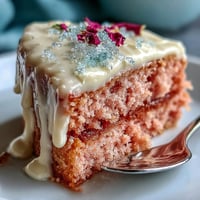
Save There was a quiet moment, once the cake had been placed on the party table and everyone gathered. The shimmer and sparkle drew kids and adults alike, and I caught a few whispers about how it looked too beautiful to eat. It felt good knowing my late-night recipe experiments and teal-stained mixing bowls had created something memorable. That cake transformed from mere dessert into a token of all our shared excitement. At that point, it was more celebration than confection.
How to Nail the Geode Effect Every Time
Making the geode slice is honestly half the fun. Use a sharp, chilled serrated knife and carve confidently—a hesitant hand can leave ragged edges. Layer the sugar crystals strategically: start with the most translucent bits in the center for that natural mineral look, then deepen outwards with more intense teal. Too damp? Allow crystals to dry fully before pressing them on; this keeps everything crispy and prevents buttercream from dissolving them. Have a friend help with gold leaf placement—two sets of hands make the process feel like a celebration.
Choosing the Right Cake Topper
I tried both custom grad hats and glittery text toppers, but what made guests grin was the small teal cap perched right at the geode's edge. Attach any topper after decorating, gently pressing down to prevent disturbing the geode area. If you need extra height, use a food-safe stick so it stands tall amidst the sugar crystals. Match topper colors to the teal and gold accents for cohesive beauty. Sometimes, a simple single word is just enough—let the geode shine as the main event.
Troubleshooting Texture and Moisture
Keeping layered cakes from drying out is key—simple syrup brushed in moderation helps. If your buttercream seems heavy, a splash more cream saves the day and softens every bite. Use parchment paper for easy transfers; nothing ruins excitement like a cake sticking to the pan. Resist the urge to cut the geode wedge before chilling, even if the cake feels solid. Celebrate small wins along the way.
- Don't skip leveling—uneven layers make stacking stressful.
- Always sift powdered sugar for the silkiest buttercream.
- Making the geode effect first on a mini practice cake helps boost confidence.
 Save
Save This graduation cake is both a work of art and a sweet tribute—serve it with fanfare and a toast to what's next. Every slice brings the celebration to life.
Common recipe questions
- → How is the geode effect created?
The geode effect is made by carving a slice from the cake and pressing teal colored rock sugar crystals into the cut, then adding edible gold leaf for shine.
- → What colors are used for the decoration?
Teal gel food coloring is used for the buttercream and sugar crystals, with gold accents provided by edible gold leaf or luster dust.
- → Can I use different flavors for the sponge?
Yes, you can substitute vanilla extract with lemon or almond for additional flavor, as noted in the instructions.
- → Which tools are needed for assembling the cake?
You'll need an electric mixer, mixing bowls, three round cake pans, offset spatula, parchment paper, serrated cake knife, and food-safe paintbrush.
- → How many servings does this cake yield?
The cake serves about 16, making it suitable for medium gatherings and graduations.
- → What allergens should I be aware of?
The cake contains wheat, eggs, and dairy. Check food coloring and sugar brands for possible nut traces.
- → How long does the process take?
Total time is approximately 2 hours 30 minutes, including preparation, baking, cooling, and decorating.