 Save
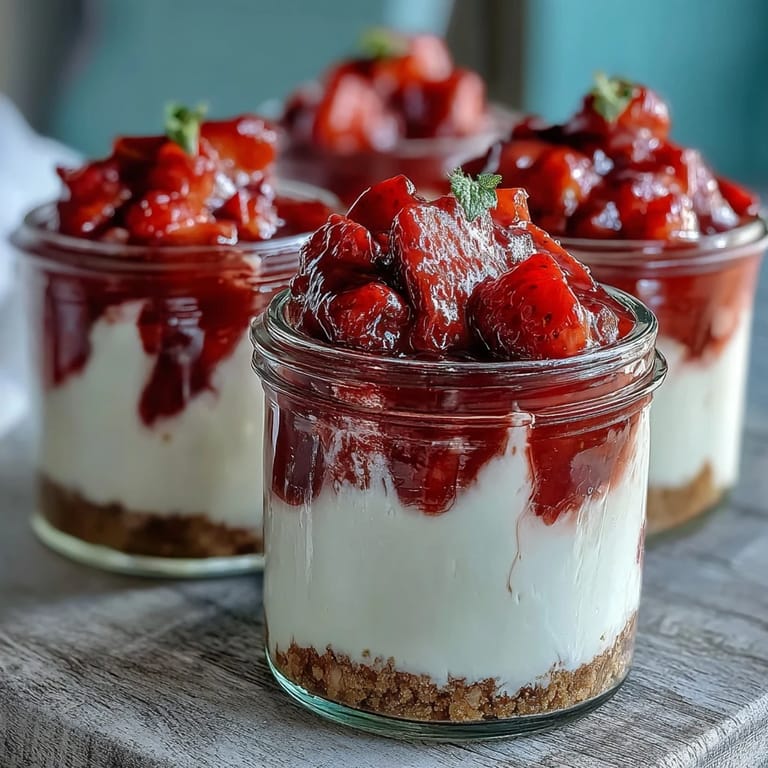
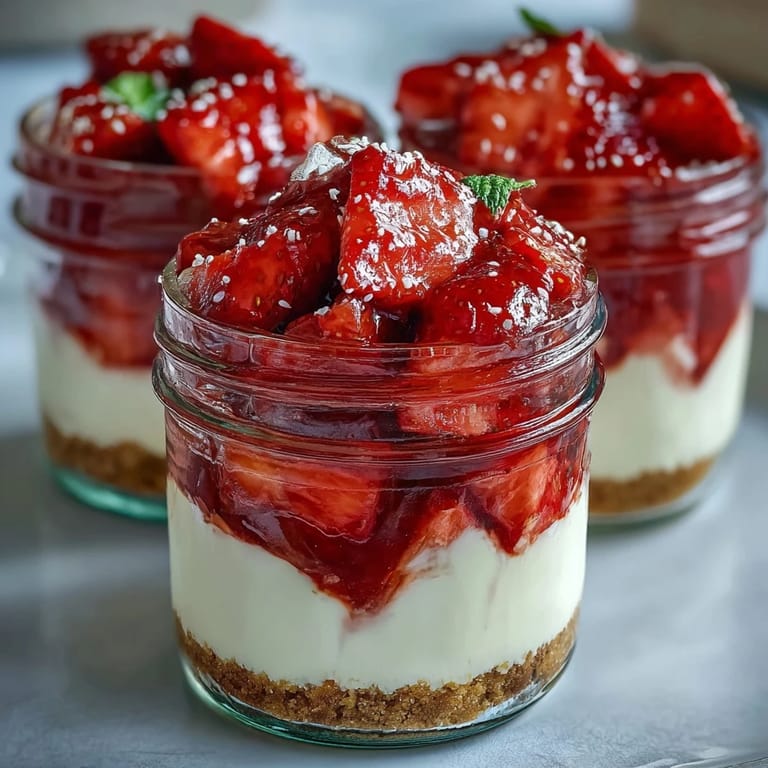
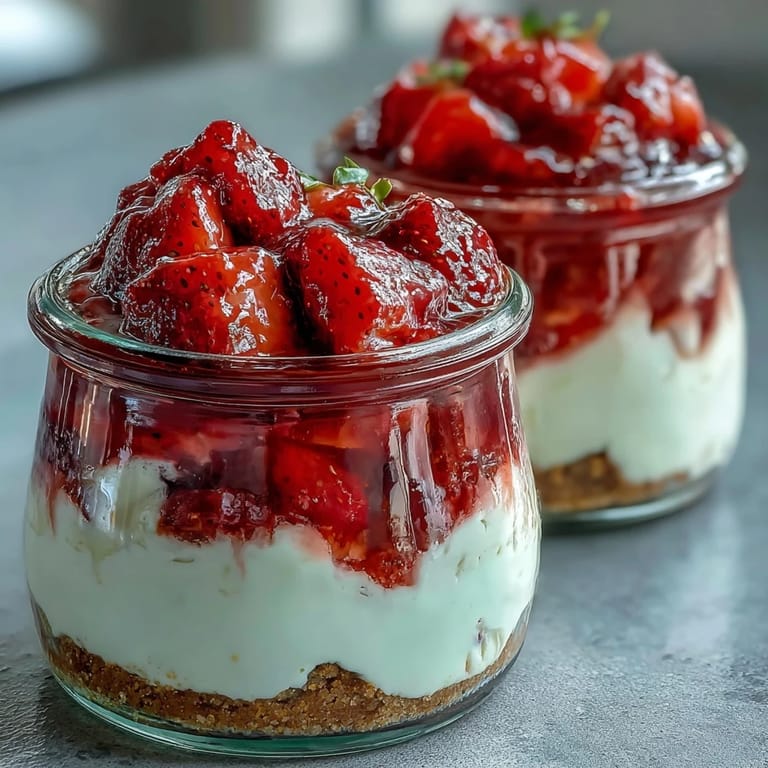
Save Last spring, the scent of warm strawberries filled my kitchen as I tried to impress my cousin with a dessert that didn’t require turning on the oven. I remember leaning over the counter, wondering if layering cheesecake in jars would really be as charming as it sounded. As I spooned creamy filling into glimmering glass, the simple joy of mixing flavors and textures made the afternoon quietly delightful. There’s a playfulness to assembling each component, made vivid by the glistening compote and the anticipation of chilling. These No-Bake Strawberry Cheesecake Jars quickly became my go-to for gatherings where time is short but smiles are important.
I made these jars for a picnic last June, packing them in a cooler nestled between lemonade and homemade sandwiches. The sound of laughter and clinking jars reminded me how food, especially something sweet and layered, brings everyone closer. Watching friends swirl their spoons through buttery crumbs and creamy filling, I realized the format made sharing easier, especially when everyone grabbed their own jar. Someone dripped compote on their shirt and just shrugged, grinning—proof that dessert is best when the mood is messy and lighthearted. Those little jars turned a casual afternoon into something special, one bite at a time.
Ingredients
- Graham crackers or digestive biscuits: Crushed biscuits form a buttery base that contrasts perfectly with creamy layers; I find pulsing them in a food processor yields a finer texture for pressing.
- Unsalted butter: Melted butter binds the crumbs and adds richness; letting it cool slightly before mixing prevents sogginess.
- Cream cheese: Softened cream cheese gives the cheesecake layer its signature tang and silkiness; letting it come to room temperature avoids lumps.
- Whipping cream: Cold cream whips up to airy peaks—chill the bowl and beaters for fluffiest results.
- Powdered sugar: Adds sweetness while dissolving readily, ensuring a smooth filling without gritty sugar granules.
- Vanilla extract: A dash rounds out the flavor, making the cheesecake layer taste nostalgic and homey.
- Lemon zest: Brings brightness and balances the richness; I use a microplane for the finest texture.
- Fresh strawberries: For the compote, sweet and tart strawberries break down beautifully; I prefer ones just picked for their vibrant flavor.
- Sugar: Enhances strawberries’ natural sweetness in the compote—taste and adjust as needed depending on berry ripeness.
- Lemon juice: Sharpens the compote and keeps it from tasting flat; fresh juice really makes a difference.
- Whole strawberries: Perfect for topping—choose the prettiest ones, and it’s okay if they’re small.
- Fresh mint leaves (optional): The hint of mint adds a refreshing finish; gently bruise the leaves to release aroma before placing them atop each jar.
Tired of Takeout? 🥡
Get 10 meals you can make faster than delivery arrives. Seriously.
One email. No spam. Unsubscribe anytime.
Instructions
- Build the biscuit base:
- Mix crushed biscuits with melted butter until sandy, then press into the bottom of each jar so it’s snug but not too dense. As you press, listen for the slight crunch, and make sure the layer feels firm under your spoon.
- Prepare the cheesecake layer:
- Beat cream cheese with powdered sugar, vanilla, and lemon zest until it’s velvety, taking time to scrape the bowl so every bite is smooth. Separately whip the cream to soft peaks, then gently fold it into the cheese mixture—watch as it transforms into a pale, pillowy filling.
- Layer and chill:
- Spoon the cheesecake mixture over the biscuit base, smoothing each jar’s surface so it glistens. Pop them into the fridge for at least two hours; the quiet chill sets everything into place.
- Make the strawberry compote:
- Combine chopped strawberries, sugar, and lemon juice in a saucepan, stirring as they soften and release juice. In just a few minutes, the kitchen will smell sweet—cook until the fruit breaks down and the sauce thickens, then let it cool fully.
- Assemble and garnish:
- Once chilled, spoon the cooled compote over each jar, letting the red sauce cascade with a gentle swirl. Top with a whole strawberry and mint leaf if you like, then serve those jars chilled to delighted hands.
 Save
Save The first time these cheesecake jars turned into more than a recipe was at a birthday dinner, candles flickering and jars clustered on the table. There was hushed anticipation as everyone reached for theirs, and the taste brought a hush of appreciation that felt bigger than dessert itself. It became the evening's memorable treat, turning strangers into friends and conversation into laughter. That moment, surrounded by clinking glass and shared flavor, made these jars more than just something sweet. I still smile when I think about it.
Getting the Layers Just Right
Layering is almost an art: pressing crumbs firmly, swooping cheesecake gently, and dolloping compote so each topping feels luscious. I often use the back of a spoon to create that smooth surface, making even the most basic jar look whimsical. Watching the compote swirl and settle is oddly satisfying, especially when serving guests. If the jars have curves, angle your spoon to reach every side without scraping too hard. Layering softly preserves each distinct flavor and makes each bite a miniature journey.
Making the Compote Sing
There’s a moment just before the compote thickens where the strawberries start to collapse into syrup—that’s when the flavor is deepest. Stirring occasionally, watch for bubbles and a glossy sheen, then remove from heat so it stays a bit chunky. Cooling fully before layering keeps the cheesecake from melting, making the finished dessert firmer. If your berries aren’t very sweet, a tiny pinch more sugar brings balance. Lemon juice brightens everything and prevents the compote from tasting too heavy.
Jar Presentation Secrets
Choosing jars isn’t just about size—it’s about how each layer will look and how easy it’ll be to spoon. Stack ingredients slowly, wiping the inside edges clean with a napkin for a photo-worthy finish. Garnishes like mint can be tucked just beside the strawberry for a splash of color and aroma. Swapping in blueberries or raspberries lets you vary the compote according to the season.
- If jars are too tall, use a chopstick to help push filling into corners.
- For picnics, screw on lids and wrap jars in cloth for safe travel.
- Remember to let guests know there’s real butter in the base for anyone tracking allergens.
 Save
Save Even after the last spoonful, these jars leave a sense of springtime lingering. Here’s hoping your kitchen fills with laughter and berry-scented air as you make them.
Common recipe questions
- → What type of biscuits can be used for the base?
Graham crackers or digestive biscuits work well. For gluten-free options, choose certified gluten-free biscuits.
- → Can this dessert be prepared in advance?
Absolutely! Assemble the jars up to 24 hours ahead and chill. The flavors intensify and the texture improves overnight.
- → Is whipping cream required for the cheesecake layer?
Yes, whipping cream creates a light, airy texture and helps the cheesecake set without baking.
- → Can I substitute strawberries with other fruits?
Raspberries or blueberries make excellent substitutes for strawberries. Adjust sugar to taste for each fruit.
- → What tools are needed for assembly?
You’ll need glass jars, mixing bowls, a mixer or hand mixer, a saucepan for the compote, and a spoon or spatula.
- → Are there any major allergens?
This dessert contains milk and gluten. Always check ingredient labels for allergen information.